Embrace a healthier, convenient way to enjoy a classic snack! Silicone poppers offer a reusable alternative to bagged popcorn, promoting eco-friendly practices.
What is a Silicone Popcorn Popper?
A silicone popcorn popper is a reusable kitchen gadget designed for making popcorn in the microwave. Typically collapsible for easy storage, these poppers are crafted from food-grade silicone, ensuring safety and durability. Unlike pre-packaged microwave popcorn, they allow you to control the ingredients, avoiding potentially harmful chemicals and excessive butter or salt.
These poppers come in various sizes and designs, often featuring expandable walls that unfold during popping to catch the kernels. They are a sustainable alternative to disposable paper bags, reducing waste and offering a cost-effective solution for popcorn lovers. Essentially, it’s a simple, safe, and eco-conscious way to enjoy fresh, homemade popcorn.
Benefits of Using a Silicone Popper
Silicone popcorn poppers offer a multitude of advantages over traditional methods. Primarily, they promote healthier eating by allowing complete control over ingredients – ditch the artificial flavors and excessive salt! They are incredibly convenient, requiring minimal cleanup as most are dishwasher safe.
Beyond health and convenience, silicone poppers are environmentally friendly, reducing reliance on disposable bags. They’re also cost-effective in the long run, eliminating the recurring expense of pre-packaged popcorn. Furthermore, the collapsible design saves valuable kitchen storage space. Enjoy fresh, flavorful popcorn without compromising your health or the planet – a win-win situation!

Preparing Your Silicone Popcorn Popper
Proper preparation is key for perfect popcorn! Selecting quality kernels and measuring accurately ensures optimal popping and minimizes the risk of unpopped grains.
Choosing the Right Kernels
Selecting the appropriate kernels significantly impacts the final result when using a silicone microwave popcorn popper. While most kernels will work, certain varieties consistently deliver superior popping performance. Mushroom kernels are favored for their large, round shape, ideal for coating with seasonings, and they tend to produce fewer hulls. Butterfly kernels, the most common type, create the classic “butterfly” shape with delicate wings, but can be messier.
Consider the kernel’s freshness; older kernels may have lower moisture content, leading to reduced popping rates. Look for kernels that are plump and uniformly shaped, avoiding any that appear shriveled or damaged. Experimenting with different brands and varieties can help you discover your personal preference for taste and texture. Ultimately, a high-quality kernel will yield a more satisfying and enjoyable popcorn experience.
Measuring the Correct Amount of Kernels
Accurate kernel measurement is crucial for optimal popping and preventing potential issues within your silicone popper. Overfilling can lead to unpopped kernels and potential overflow, while underfilling results in a disappointing yield. Most standard-sized silicone poppers accommodate between ¼ and ½ cup of kernels.
Begin with ¼ cup for a smaller batch, especially when using your popper for the first time. You can gradually increase the amount in subsequent batches to find your preferred volume. Using a dedicated measuring cup ensures consistency. Avoid estimating, as even slight variations can affect the outcome. Remember to leave enough headspace within the popper for the popcorn to expand during the popping process, ensuring even cooking and preventing a messy cleanup.
Adding Oil (Optional)
While not essential, adding a small amount of oil can enhance the flavor and texture of your popcorn. If desired, use a healthy oil like coconut, avocado, or olive oil – approximately 1 to 2 teaspoons for ¼ cup of kernels is sufficient.

Pour the oil into the popper before adding the kernels, ensuring even distribution. Gently toss the kernels to coat them lightly. Be cautious not to overdo the oil, as excessive amounts can result in soggy popcorn or potential splattering inside the microwave. Many users successfully pop popcorn without any added oil, relying on the natural oils within the kernels. Experiment to discover your preferred method and achieve the perfect balance of flavor and healthiness.

Step-by-Step Instructions for Microwave Popping
Follow these simple steps for perfectly popped corn! Proper placement, timing, and monitoring are key to enjoying a delicious, homemade snack effortlessly.
Placement in the Microwave
Ensuring correct placement within your microwave is crucial for optimal popping and even heat distribution. Always center the silicone popcorn popper on the microwave turntable. If your microwave lacks a turntable, position the popper directly in the middle of the microwave floor.
Avoid placing the popper in a corner or against the microwave walls, as this can lead to uneven heating and unpopped kernels. Leave sufficient space above the popper – at least a few inches – to allow for expansion during the popping process. This prevents the lid from potentially sticking to the microwave’s top surface.
Confirm there are no obstructions within the microwave cavity that could interfere with the popper’s movement or heat circulation. Proper positioning maximizes efficiency and minimizes the risk of burning.
Microwave Time & Power Levels
Determining the correct microwave time and power level is vital for perfectly popped corn. A general guideline is to start with 2-4 minutes on high power (typically 800-1200 watts). However, microwave wattages vary significantly, so initial testing is recommended.
Begin with 3 minutes and listen carefully. Once the popping slows to 2-3 seconds between pops, immediately stop the microwave; Overcooking leads to burnt popcorn. For lower wattage microwaves (700 watts or less), increase the time to 4-5 minutes.
Some poppers may include specific time recommendations; always prioritize those instructions. Monitor closely during the first use to establish the ideal settings for your microwave and popper combination.
Monitoring the Popping Process
Active listening is key to preventing burnt popcorn! Remain near the microwave during the entire popping cycle. The popping sound will start rapidly and then gradually slow down.
The crucial moment is when the interval between pops extends to 2-3 seconds. This indicates most of the kernels have popped, and continuing to microwave will likely result in burning. Immediately stop the microwave at this point – do not wait for complete silence.
Avoid relying solely on timing; sound is the most reliable indicator. Visual inspection isn’t practical during popping, so prioritize auditory cues for optimal results and a delicious snack.
Safety Precautions
Always use oven mitts when handling the hot silicone popper after microwaving. Steam release can cause burns, so exercise caution during removal and emptying.
Handling Hot Silicone
Silicone, while heat-resistant, becomes very hot after microwave use. Always use oven mitts or pot holders when removing the popper from the microwave. Direct contact will cause burns, even if the silicone feels flexible. Allow a brief cooling period before attempting to handle it, but don’t assume it’s cool enough to touch barehanded.
Be mindful of the escaping steam, as it’s also extremely hot and can cause severe burns. Carefully tilt the popper away from your face and body when opening to release steam. Consider using a long utensil to initially lift a corner, creating a small vent for steam to escape gradually. Prioritize safety to fully enjoy your freshly popped treat!
Avoiding Burns from Steam
The most significant burn risk when using a silicone popcorn popper is from the escaping steam. Superheated steam builds up during popping and releases rapidly upon opening. Never position your face or hands directly over the popper when lifting the lid or tilting it.
A slow, controlled opening is crucial. Gently lift one corner of the popper, allowing steam to vent away from you. Using a long-handled utensil, like a wooden spoon, can provide extra distance and protection. Be aware that even after the initial burst, residual steam may remain, so proceed with caution. Prioritize a safe opening technique to prevent painful burns.
Microwave Compatibility
Silicone is generally considered microwave-safe, but verifying your specific popper’s instructions is vital. Most high-quality silicone poppers are designed to withstand microwave temperatures without melting or leaching chemicals. However, older or lower-grade silicone may not be as resilient.
Always check the product packaging or manufacturer’s website for explicit microwave-safe confirmation. Avoid using damaged or discolored poppers, as their structural integrity may be compromised. Ensure the popper doesn’t come into direct contact with the microwave’s heating element or rotating turntable motor. Proper usage guarantees safe and effective popcorn preparation.
Cleaning and Maintenance
Maintaining your silicone popper is simple! Regular cleaning prevents odor buildup and ensures optimal performance for countless delicious, homemade popcorn batches.
Dishwasher Safe?
Generally, most silicone popcorn poppers are indeed dishwasher safe, offering a convenient cleaning solution after enjoying your freshly popped treat. However, it’s always best to check the manufacturer’s specific instructions, often found on the product packaging or their website, to confirm compatibility.
While dishwasher safe, prolonged exposure to harsh detergents and high heat cycles could potentially degrade the silicone over time, shortening its lifespan. If you prefer, hand washing is a gentle alternative. Some poppers with attached lids or components might be best washed on the top rack to avoid melting or warping. Prioritizing gentle care will ensure your popper remains a reliable kitchen companion for years to come!
Hand Washing Instructions
For optimal longevity and cleanliness, hand washing your silicone popcorn popper is a fantastic option. Begin by allowing the popper to cool completely after use – never attempt to wash a hot popper! Use warm, soapy water and a soft sponge or dishcloth to gently scrub away any remaining popcorn residue.
Avoid abrasive cleaners or scouring pads, as these can damage the silicone’s surface. Pay close attention to any crevices or corners where kernels might become lodged. Rinse thoroughly with clean water, ensuring all soap is removed. Finally, allow the popper to air dry completely before storing. This simple routine will keep your popper fresh and ready for your next popcorn craving!
Preventing Odor Absorption
Silicone is generally resistant to odors, but prolonged exposure to strong flavors can sometimes lead to absorption. To minimize this, ensure the popper is thoroughly cleaned after each use, removing all popcorn remnants. A quick soak in warm water with a touch of baking soda can help neutralize any lingering smells.
Avoid storing the popper with strongly scented items. If odors persist, try leaving the popper open to air for several hours, or even overnight. Sunlight can also help to naturally deodorize silicone. Proper cleaning and storage are key to maintaining a fresh-smelling popper, ensuring your popcorn always tastes its best!

Troubleshooting Common Issues
Encountering problems? Don’t worry! We’ll address common issues like unpopped kernels, burnt popcorn, and rare melting scenarios for a perfect popping experience.
Popcorn Not Popping
If your kernels aren’t popping, several factors could be at play. First, ensure you’re using fresh kernels; older kernels lose moisture and won’t pop effectively. Verify the microwave is functioning correctly – test with a known working item.
Insufficient heat is a common culprit. Confirm your microwave’s power level is appropriate (usually high). Also, check that the popper is positioned correctly within the microwave, allowing for even heat distribution. Sometimes, a small amount of oil (if using) can help conduct heat.
Finally, ensure you haven’t overloaded the popper; kernels need space to expand. A slightly damp kernel can also hinder the process, so keep them stored in an airtight container.
Burnt Popcorn
Burnt popcorn is a frustrating outcome, but often preventable. The most common cause is overcooking. Microwave ovens vary significantly, so initial timing recommendations are just starting points; Begin with the suggested time, but listen carefully for the popping to slow down.
The moment the intervals between pops exceed 2-3 seconds, immediately stop the microwave. Continuing to heat after this point will almost certainly result in burning. Also, ensure your microwave’s power level isn’t set too high; a slightly lower power setting can provide more even heating.
If burning persists, try reducing the initial cooking time by 15-30 seconds.
Silicone Popper Melting (Rare)
While uncommon, silicone popper melting can occur, usually due to exceeding the silicone’s temperature limit or using a microwave with uneven heating. High-quality, food-grade silicone is designed to withstand microwave temperatures, but prolonged exposure to excessive heat is problematic.
Ensure your microwave is functioning correctly and doesn’t have hot spots. Never leave the microwave unattended during popping. If you notice any signs of deformation or melting – even slight – immediately stop the microwave and discard the popper.
Using a popper that shows damage is unsafe. Always inspect your popper before each use for any signs of wear or tear.

Advanced Techniques & Recipes
Elevate your popcorn game! Experiment with seasoning blends post-popping, or try adding flavorful oils and spices directly into the popper before microwaving.
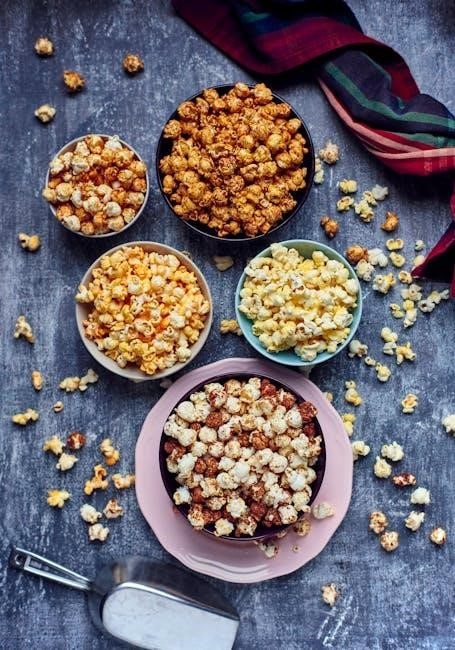
Adding Seasonings After Popping
Once your popcorn has finished popping and cooled slightly, the real fun begins – customizing the flavor! This method offers the greatest control and prevents seasonings from burning during the cooking process. Simply pour the popped corn into a large bowl.
Melted butter is a classic choice, drizzled evenly over the popcorn. For a more even coating, consider spraying with a light mist of oil before adding seasonings. Popular options include salt, pepper, garlic powder, onion powder, paprika, nutritional yeast (for a cheesy flavor), and chili powder.
Don’t be afraid to get creative! Experiment with pre-made seasoning blends, or create your own signature mixes; A dash of cinnamon sugar offers a sweet treat, while Italian seasoning provides a savory kick. Toss thoroughly to ensure every kernel is coated in deliciousness.
Creating Flavored Popcorn Directly in the Popper
For a more integrated flavor experience, you can add seasonings before popping, though caution is key! Start with dry seasonings – avoid liquids which can cause uneven cooking. Sprinkle a small amount of your chosen spice blend (garlic powder, parmesan cheese, chili powder) directly into the popper with the kernels.
Be conservative; a little goes a long way! Too much seasoning can burn and create a bitter taste. Ensure the seasoning is evenly distributed amongst the kernels before adding the lid.
Oil is crucial when flavoring directly in the popper, as it helps the seasonings adhere. Follow the recommended oil amount and toss gently to coat. Monitor closely during popping, as flavored popcorn may require slightly adjusted cook times to prevent burning.